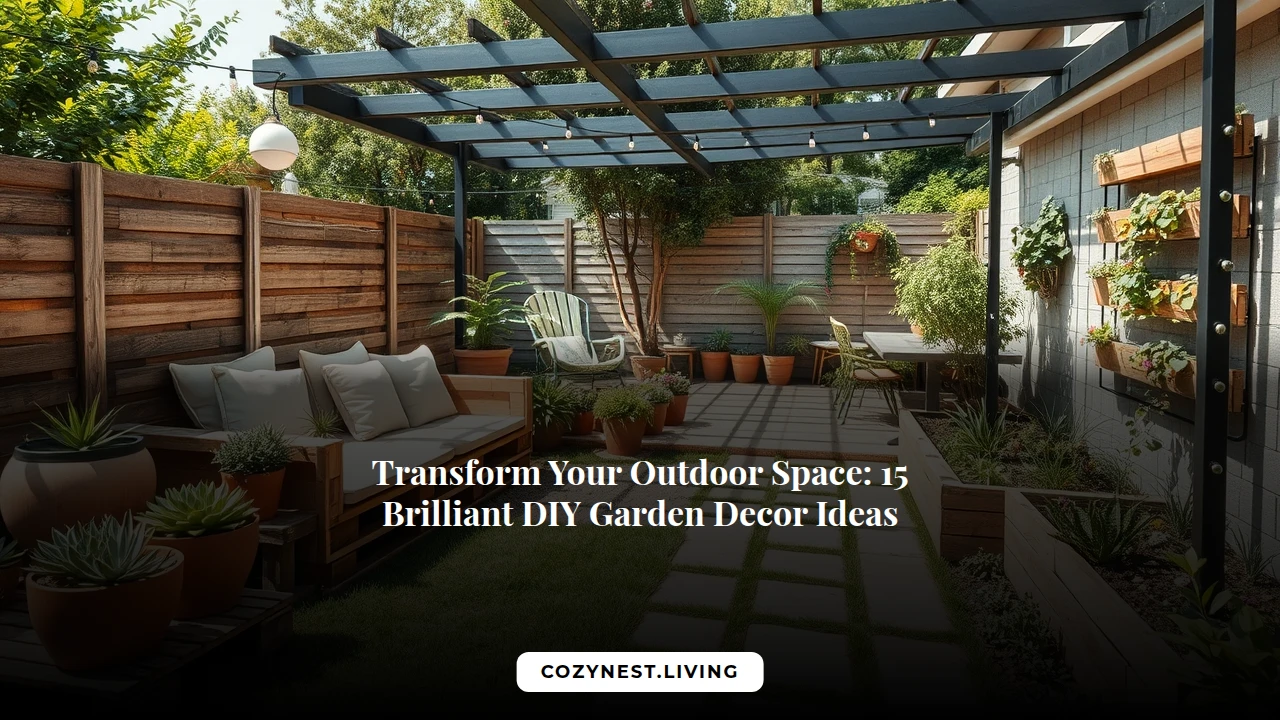
Transform Your Outdoor Space: 15 Brilliant DIY Garden Decor Ideas
With a little creativity, you can transform your backyard into a stunning oasis that’s perfect for relaxation and entertainment. From upcycled planters to handmade garden ornaments, we’ve rounded up 15 brilliant DIY garden decor ideas to inspire your next outdoor project. Whether you’re looking to add a touch of whimsy or create a serene retreat, these ideas will help you get started on designing your dream outdoor space.
Idea 1: Upcycled Tire Planters
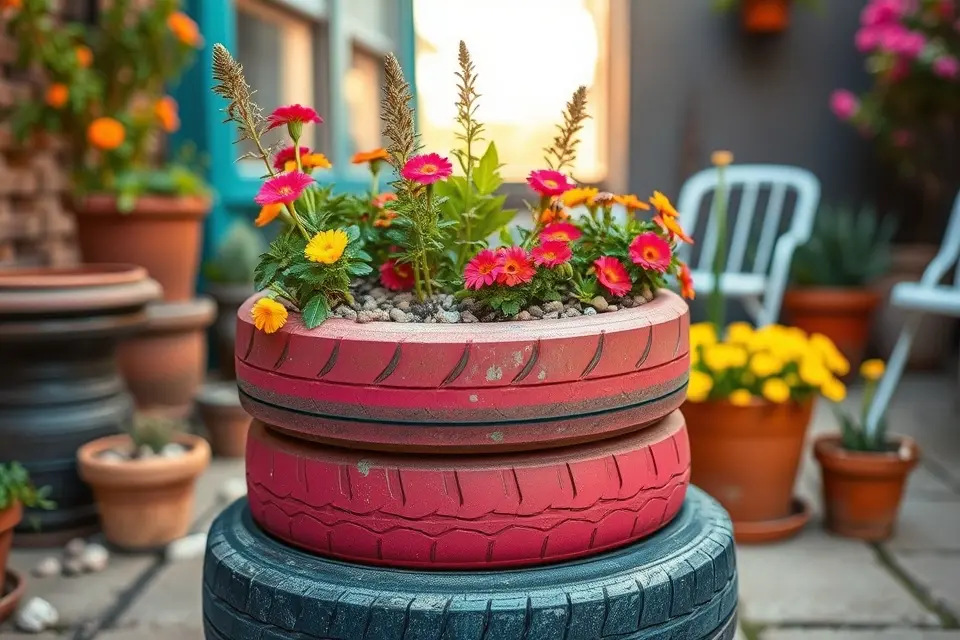
Old tires can be given a new lease on life as vibrant, multi-level planters for flowers or herbs, injecting a unique industrial-chic touch into your garden. By stacking and arranging the tires in a creative way, you can add depth and visual interest to your outdoor space. Consider painting the tires in bold, bright colors to really make them pop.
The beauty of upcycled tire planters lies in their versatility – you can use them to grow a variety of plants, from delicate herbs like basil and rosemary, to brightly colored flowers like petunias and marigolds. To get started, simply clean and disinfect the tires, then drill a few holes in the bottom for drainage.
When it comes to arranging your tire planters, don’t be afraid to think outside the box – you can stack them horizontally, vertically, or even create a spiral pattern to add some visual intrigue to your garden. A practical tip is to place a layer of small rocks or pebbles at the bottom of each tire to improve drainage and prevent waterlogged soil.
By repurposing old tires as planters, you’ll not only be adding a touch of industrial chic to your garden, but also reducing waste and giving new life to an otherwise discarded item – a great way to get creative and make a positive impact on the environment.
Idea 2: Mason Jar Solar Lights
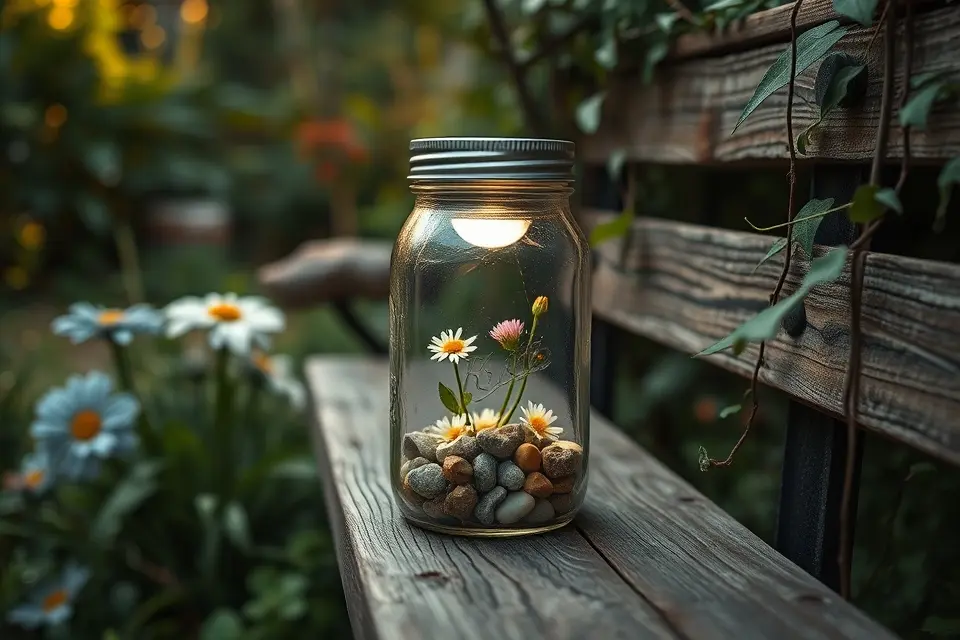
Adding a warm glow to your garden pathways or decor can elevate the entire ambiance of your outdoor space. Mason jar solar lights are a creative and eco-friendly way to achieve this, using readily available materials and a bit of DIY magic.
By filling mason jars with solar-powered lights and some decorative pebbles or flowers, you can create enchanting lanterns that are both beautiful and functional.
To make these charming lights, start by selecting mason jars of varying sizes to add visual interest to your arrangement. Then, place a solar-powered light inside each jar, surrounded by decorative elements like small rocks, seashells, or tiny flowers. This not only adds a personal touch but also helps to diffuse the light, creating a softer, more inviting glow.
Hanging these lanterns from trees or gazebos can create a whimsical and romantic atmosphere, especially during evening gatherings or summer nights. Alternatively, you can place them along walkways or around seating areas to provide warm and welcoming lighting that guides your way.
A practical tip for making the most of your mason jar solar lights is to position the solar panels in a spot that receives ample sunlight during the day, ensuring they are fully charged and ready to illuminate your garden as the sun sets, creating a truly enchanting outdoor space.
Idea 3: DIY Pallet Vertical Garden
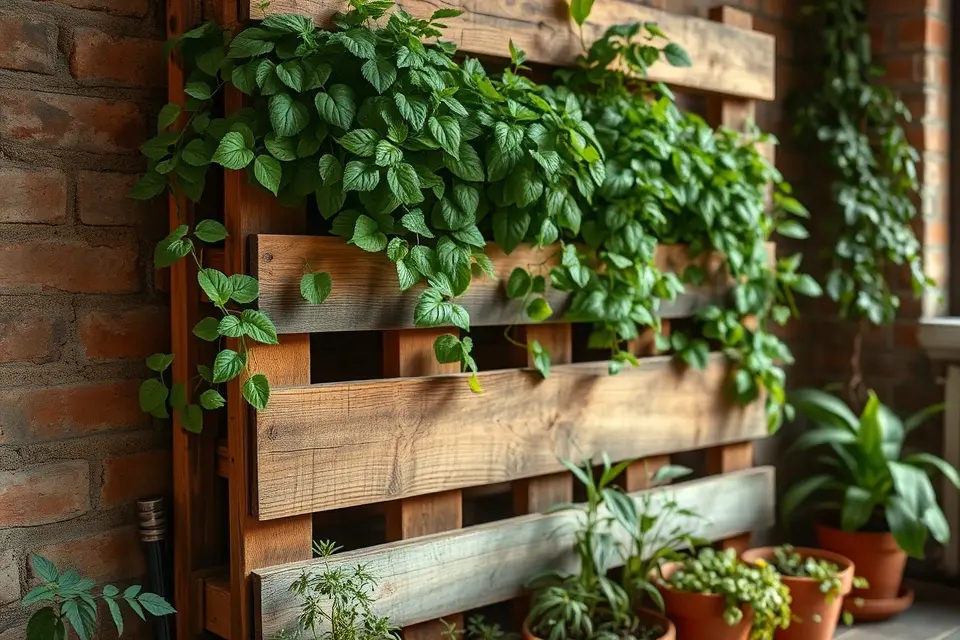
In small outdoor spaces, every inch counts, and a DIY pallet vertical garden is a genius way to make the most of your area. By repurposing old pallets, you can create a thriving garden that adds a touch of greenery to your walls, perfect for growing fragrant herbs like basil and rosemary, low-maintenance succulents, or vibrant small flowers like petunias and geraniums.
To get started, gather a few reclaimed pallets, a hammer, some nails, and a saw, and begin by disassembling the pallets into individual planks. This will give you the material you need to build the frame of your vertical garden, which can be customized to fit your space and style.
One of the best things about a pallet vertical garden is how easily it can be customized to suit your needs and the style of your outdoor space. For a rustic look, leave the pallet wood unfinished, or add a coat of paint or stain to match your decor.
As you plant your chosen greenery, consider adding a self-watering system to make maintenance a breeze, and don’t forget to leave enough space between each plant for proper growth and air circulation. With a little creativity, your DIY pallet vertical garden will be a stunning addition to your outdoor space, providing fresh herbs and a pop of color all season long.
Idea 4: Mosaic Stepping Stones
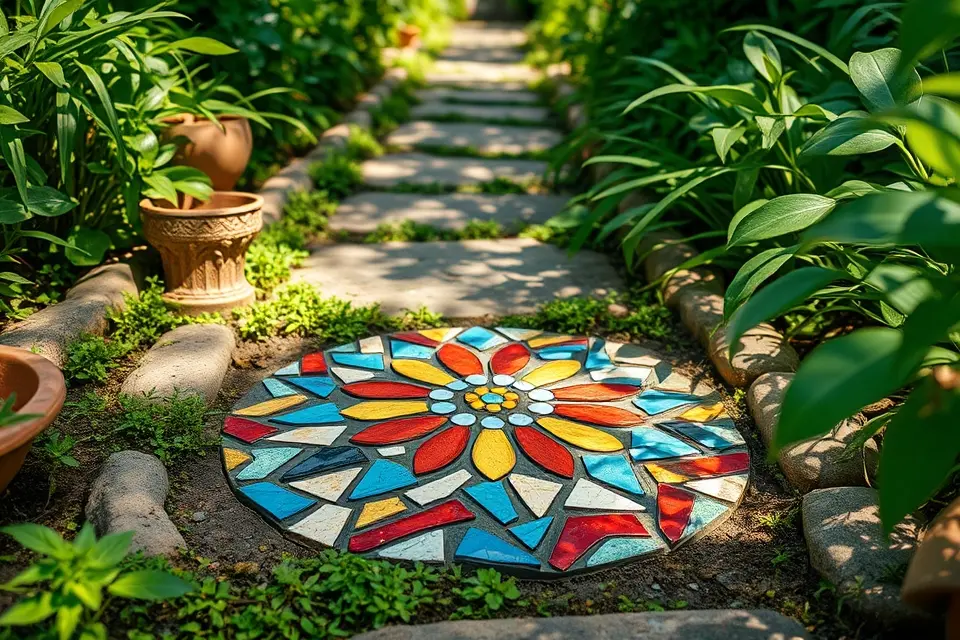
To create this unique feature, gather broken tiles, glass, or pebbles in various colors and textures, and arrange them into beautiful patterns or designs on a plain stone or concrete base.
A practical tip is to use a strong adhesive, such as tile cement, to ensure the mosaic pieces stay in place, and to seal the stones with a waterproof coating to protect them from the elements.
As you work on your mosaic masterpiece, consider the overall aesthetic you want to achieve in your garden, and choose materials that complement the existing decor, such as earthy tones or bright, bold colors.
By adding these handmade stepping stones to your garden paths, you’ll not only add a personal touch but also create a beautiful, one-of-a-kind feature that will elevate your outdoor space and make it truly special.
Idea 5: Wine Bottle Edging or Fencing
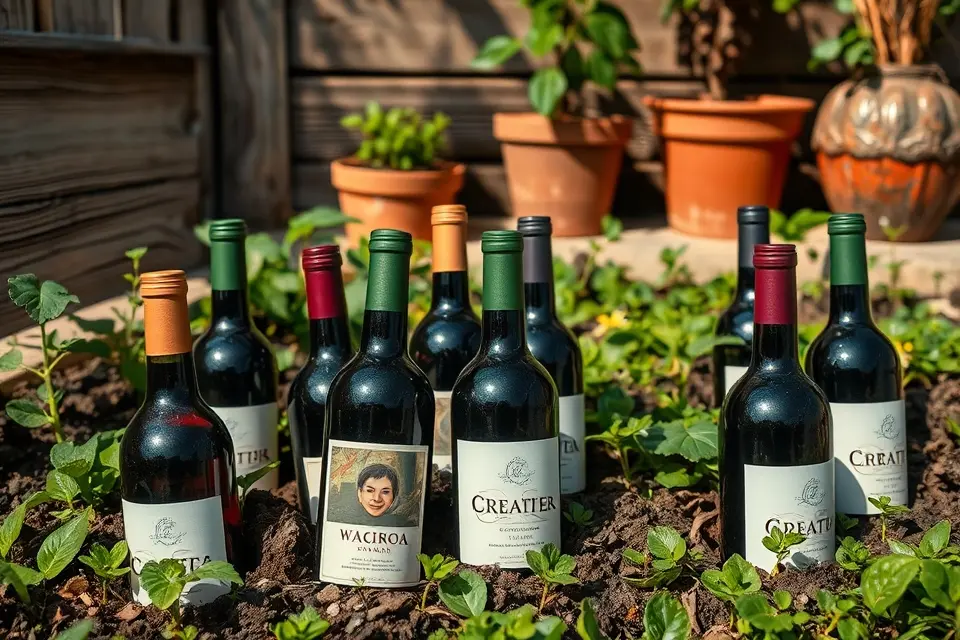
Empty wine bottles can be transformed into stunning garden borders or small fences, adding a touch of elegance to your outdoor space.
By burying the bottles up to their necks in the ground, you can create a beautiful and functional edging for your garden beds, separating lush greenery from the rest of the yard. This unique idea also helps to keep weeds at bay and adds a pop of color to your garden.
To create a more dramatic look, you can arrange the bottles in a pattern or use bottles of varying heights and colors to add visual interest. This DIY project is not only eco-friendly but also budget-friendly, as you can collect empty wine bottles from your own home or ask friends and family to contribute.
For a more intricate design, consider creating a small fence using the wine bottles, filling the space between them with soil, plants, or small rocks. This will not only add texture to your garden but also create a sense of depth and dimension.
By getting creative with empty wine bottles, you can turn them into beautiful garden decor pieces that reflect your personal style and add charm to your outdoor space, making it perfect for relaxation and entertainment.
Idea 6: Painted Rock Garden Markers
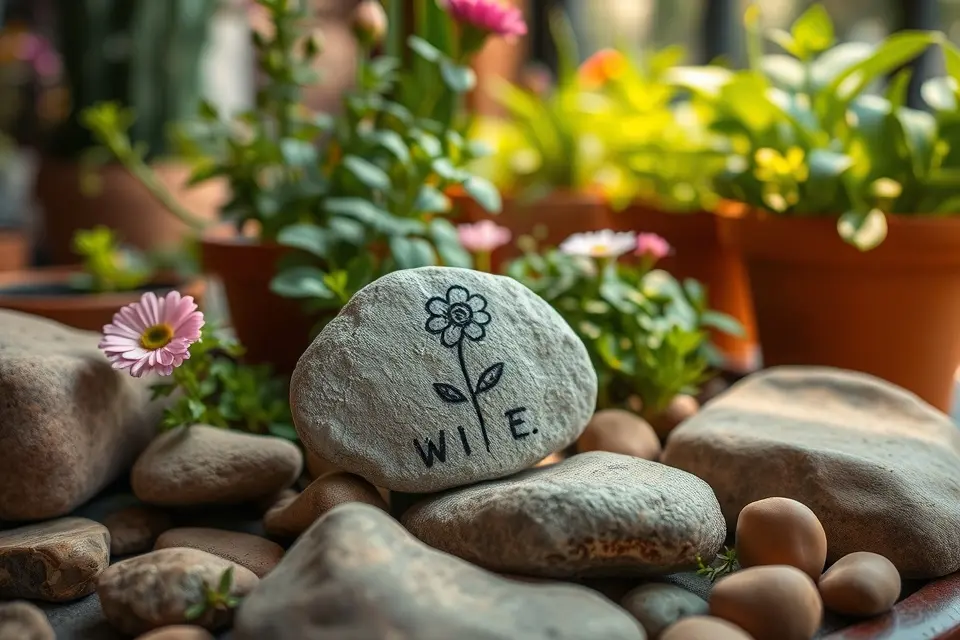
Painting rocks to use as garden markers is a simple yet effective way to add a personal touch to your outdoor space. By painting the names of the plants directly on the rocks, you can create a charming and organized look in your plant beds. Consider adding a whimsical design, like a tiny flower or leaf, to match the theme of your garden.
This DIY project is easy to customize to fit your garden’s unique style, and it’s a great way to get creative with your outdoor decor. You could paint inspirational quotes on the rocks to create a peaceful and reflective atmosphere in your garden.
To get started, gather some smooth rocks, paint, and a sealant to protect your designs from the elements. Look for rocks with a flat surface to make painting easier.
With a little creativity, you can transform ordinary rocks into beautiful garden markers that reflect your personal style and add a touch of warmth to your outdoor space.
Idea 7: Repurposed Gutter Planters
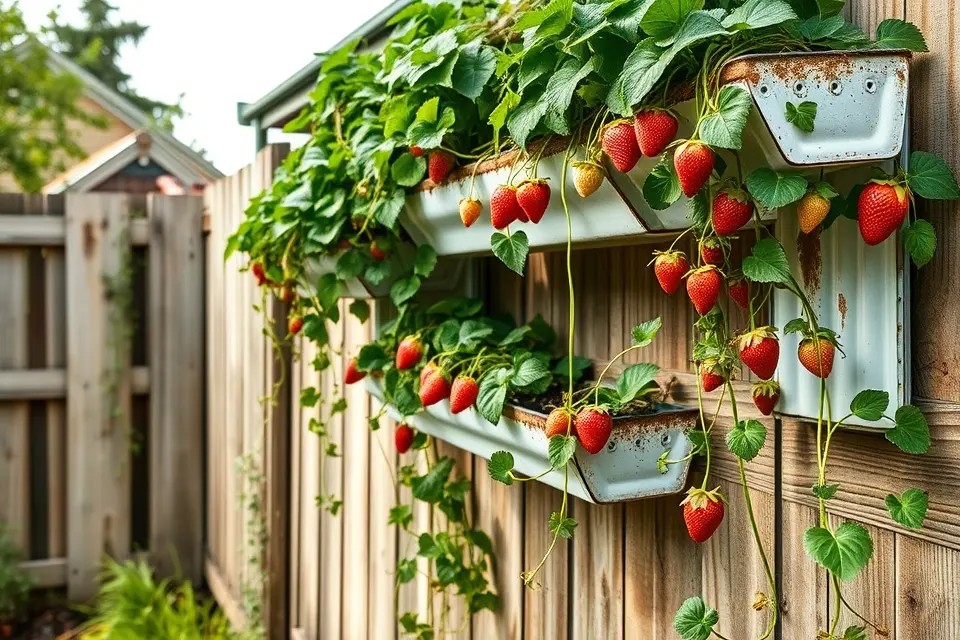
Elevate your garden’s charm with a creative twist on traditional planters. By repurposing old gutters, you can create a unique and space-saving way to grow your favorite plants. Simply attach the gutters to a fence or wall, add a layer of soil and your chosen plants, and watch your outdoor space flourish.
Trailing plants like ivy or creeping thyme work particularly well in these elevated planters, spilling over the edges of the gutters to create a lush, whimsical display. For a more edible twist, consider filling your gutter planters with strawberries or lettuce, making it easy to snip off a fresh snack whenever you like.
To get started, gather your materials, including the old gutters, a drill, and some sturdy screws. Choose a spot for your planters that receives the right amount of sunlight for your plants, and make sure the gutters are securely attached to the fence or wall to prevent them from toppling over.
As you step back to admire your handiwork, you’ll appreciate the way these repurposed gutter planters add a touch of personality to your outdoor space, proving that with a little creativity, even the most unexpected items can become beautiful garden decor.
Idea 8: Bird Bath from Terra Cotta Pots
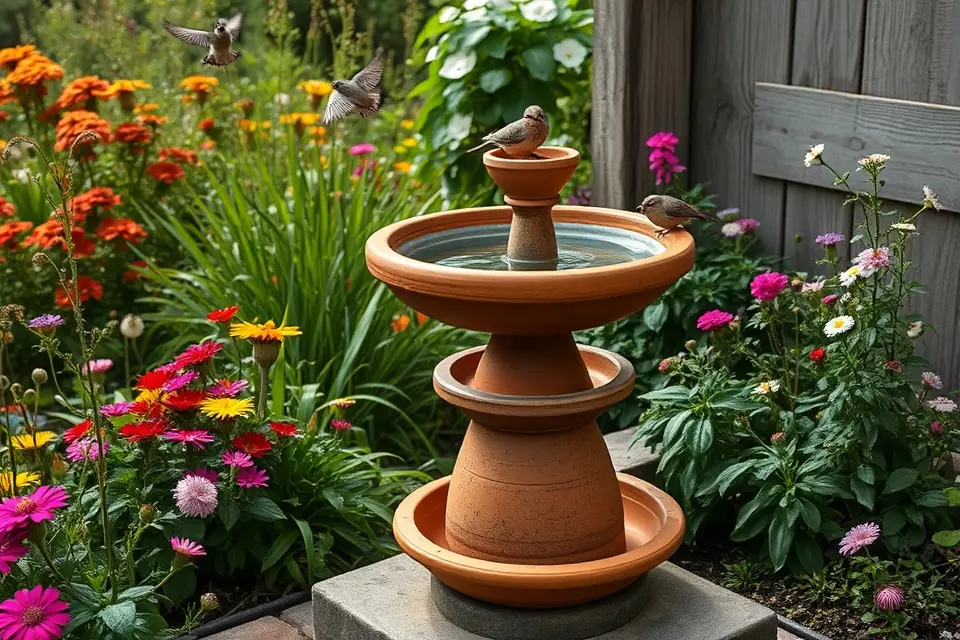
To create a haven for birds in your garden, consider repurposing terra cotta pots and saucers into a beautiful bird bath. By stacking these earthy elements, you can craft a unique and functional piece that adds charm to your outdoor space. Simply arrange the pots and saucers in a staggered formation to create a multi-level bath.
The key to this DIY project is to keep it simple and natural, allowing the terra cotta to blend seamlessly into your garden’s landscape. As you construct your bird bath, remember to leave enough space between each pot for the birds to comfortably land and take off.
A practical tip for this project is to seal the pots and saucers with a waterproof coating to prevent water from seeping into the terra cotta. This will ensure your bird bath remains functional and attractive throughout the seasons.
By incorporating this bird bath into your garden, you’ll not only be creating a stunning visual element but also a thriving ecosystem that invites birds and other wildlife to flourish, making your outdoor space a true oasis.
Idea 9: String Light Canopy
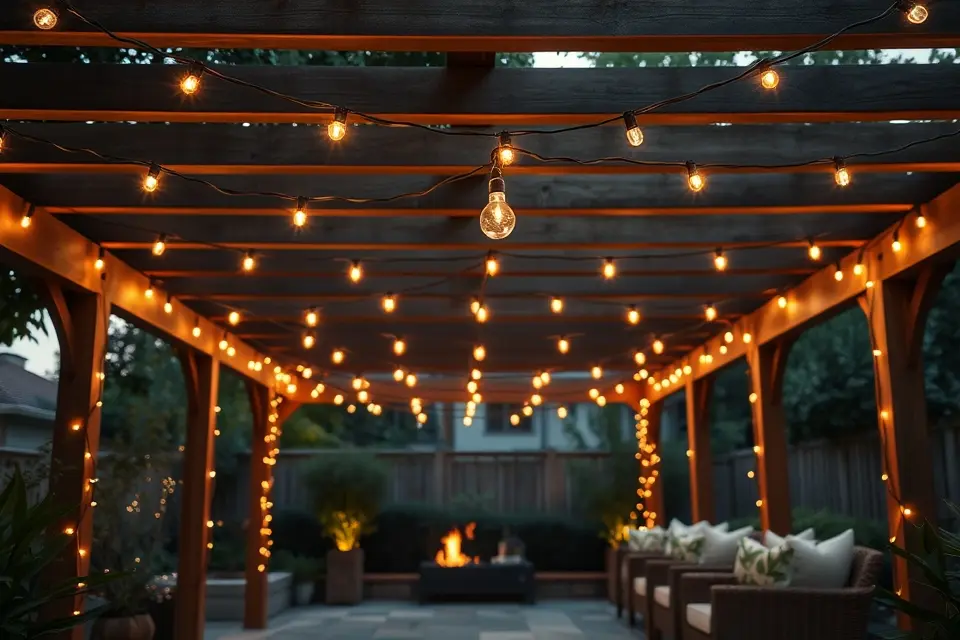
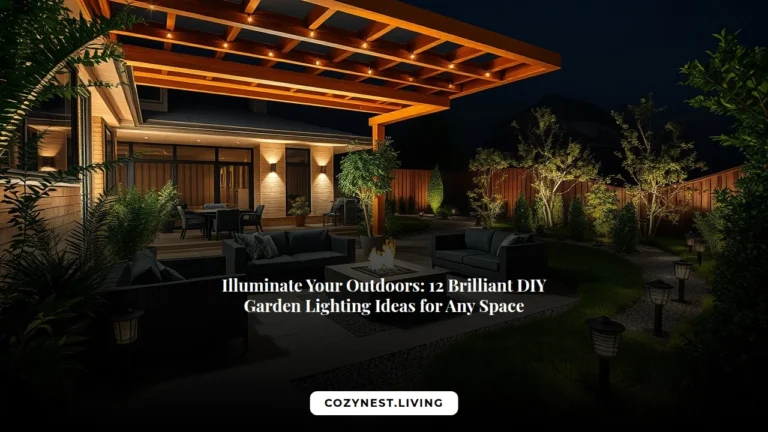
As the sun sets, a string light canopy can transform your patio into a whimsical oasis, perfect for warm summer evenings with friends and family.
By draping string lights creatively over a seating area, you can create a sense of enchantment that invites relaxation and conversation. To achieve this magical ambiance, start by selecting a sturdy base, such as a gazebo or a pergola, to support the weight of the lights.
Choose string lights that complement the color scheme and style of your outdoor space, from classic fairy lights to more modern Edison bulbs.
Consider the scale of your space and the desired level of brightness when deciding how many lights to use. A general rule of thumb is to start with a smaller set and add more lights as needed to avoid overwhelming the area.
To add an extra layer of visual interest, experiment with different draping patterns, such as a symmetrical grid or a more organic, curved design.
This will not only create a unique aesthetic but also help to distribute the light evenly throughout the space. As you work, don’t be afraid to step back and adjust the placement of the lights to achieve the perfect balance of ambiance and functionality.
By suspending string lights above your patio, you can define the space and create a cozy atmosphere that beckons you to linger long after the stars come out, making it the perfect spot to enjoy a warm summer evening with loved ones.
Idea 10: DIY Watering Can with Fairy Lights
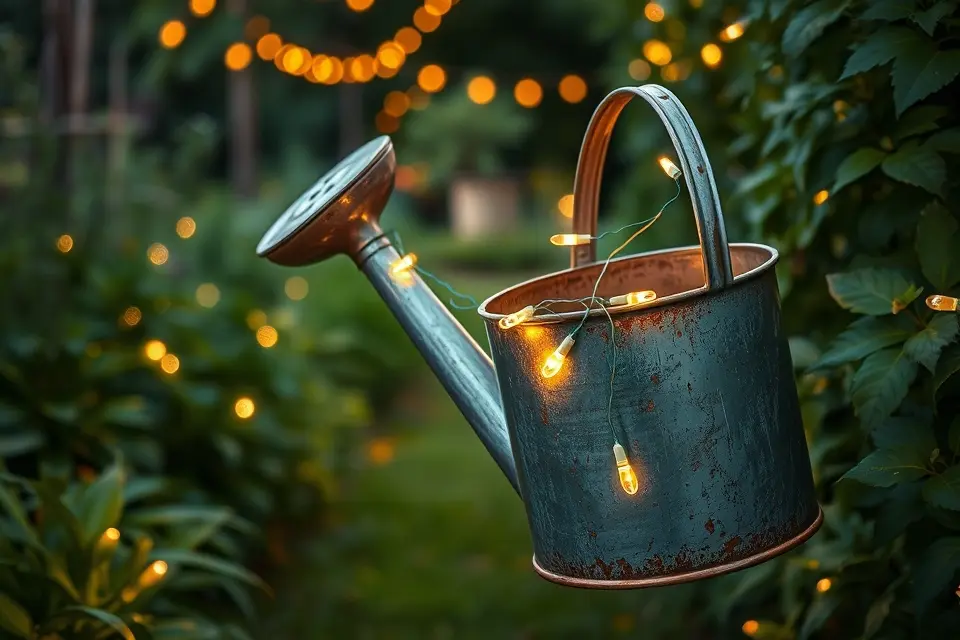
To create this enchanting ambiance, start by collecting an old watering can, its worn metal a testament to years of nurturing your outdoor space. Thread fairy lights through the spout, watching as the gentle strands weave their way through the metal, creating an illusion of light pouring into your garden.
As the lights dance through the watering can, they cast a whimsical glow on the surrounding foliage, drawing the eye to hidden corners of your garden. The effect is nothing short of mesmerizing, as if the watering can is imbuing your plants with an otherworldly energy. To enhance this visual spell, place the illuminated watering can near a pathway or beside a bench, inviting visitors to pause and marvel at the spectacle.
The beauty of this DIY project lies in its simplicity, requiring minimal materials and effort to achieve a maximum impact. By repurposing an old watering can, you’re not only reducing waste but also infusing your garden with a touch of personality. As you sit amidst the twinkling lights, surrounded by the sights and scents of nature, you’ll feel a deep connection to your outdoor space, grateful for the magic that a little creativity can bring.
To take this DIY project to the next level, experiment with different colors and arrangements of fairy lights, allowing you to tailor the ambiance to your garden’s unique character. As the seasons change, you can adapt the lighting display to complement the shifting hues of your plants, ensuring that your outdoor space remains a captivating oasis throughout the year.
Idea 11: Driftwood Garden Art
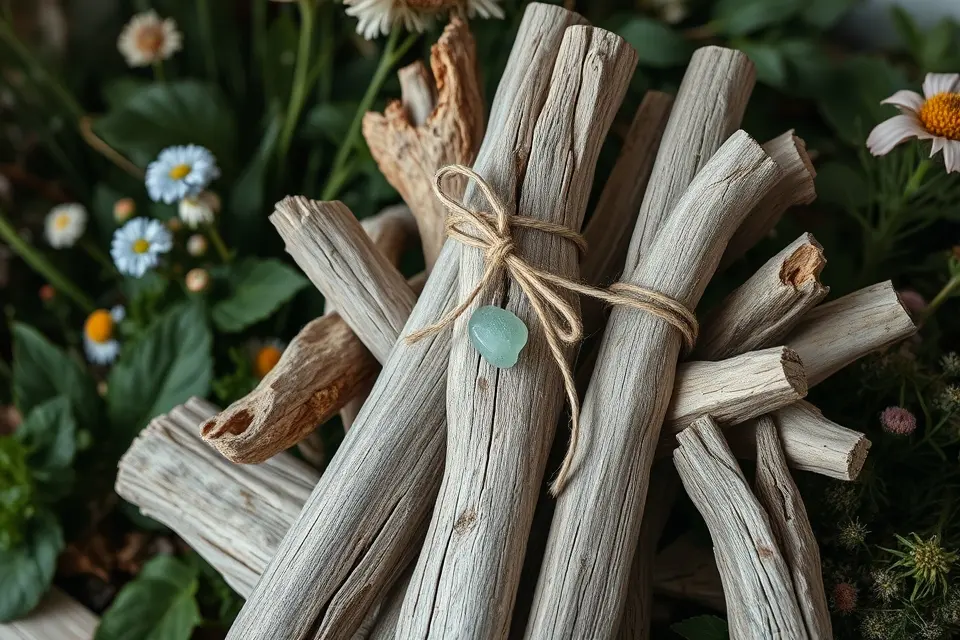
Driftwood, with its weathered textures and organic shapes, can add a touch of the wild to your garden decor. By collecting and arranging pieces of driftwood, you can create unique sculptural elements that stand tall among your flowers and greenery. Consider grouping similar shapes and sizes to form a cohesive piece, or mix and match for a more eclectic look.
As you gather your driftwood, think about the shapes and forms that inspire you – twisted branches, smooth pebbles, or delicate sea-worn spines. You can use wire or twine to tie pieces together, forming abstract sculptures that catch the eye. For a more whimsical touch, hang your driftwood pieces from a tree branch or a metal rod, creating a natural, rustic mobile that sways gently in the breeze.
To add an extra layer of visual interest, try combining your driftwood with other natural elements, like sea glass, pinecones, or dried flowers. This will help tie your garden decor together and create a sense of cohesion. When arranging your driftwood, don’t be afraid to experiment and try out different configurations – it’s all part of the creative process.
As you step back to admire your handiwork, remember that the beauty of driftwood garden art lies in its imperfections and uniqueness. Each piece is a one-of-a-kind creation, shaped by the forces of nature and brought to life by your imagination. With a little patience and creativity, you can turn discarded driftwood into stunning works of art that elevate your outdoor space and connect you with the natural world.
Idea 12: Herb Spiral Garden
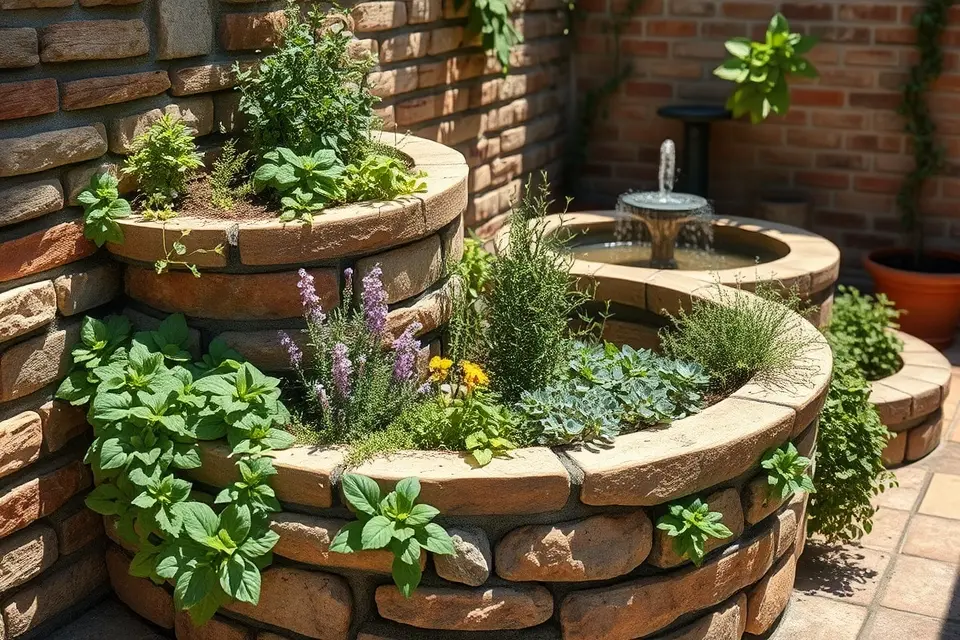
To create this space-saving and visually appealing feature, start by selecting a spot that receives plenty of sunlight and has good drainage.
Choose a variety of herbs with different growing conditions to add depth and texture to your spiral garden, such as basil, mint, and oregano. Consider using stones or bricks to build the spiral, as these materials will help to optimize the growing conditions for each herb by providing good drainage and heat retention.
As you build your herb spiral, remember to leave enough space between each layer for the herbs to grow and spread out, and don’t forget to add a layer of soil and compost to give your herbs a nutrient-rich foundation.
To make the most of your herb spiral garden, plant the herbs that require the most sunlight at the top and work your way down to the ones that prefer shadier conditions, and don’t hesitate to get creative with the design and add your own personal touches, such as a small fountain or a decorative statue, to make your herb spiral garden truly unique.
Idea 13: Cinder Block Bench and Planter
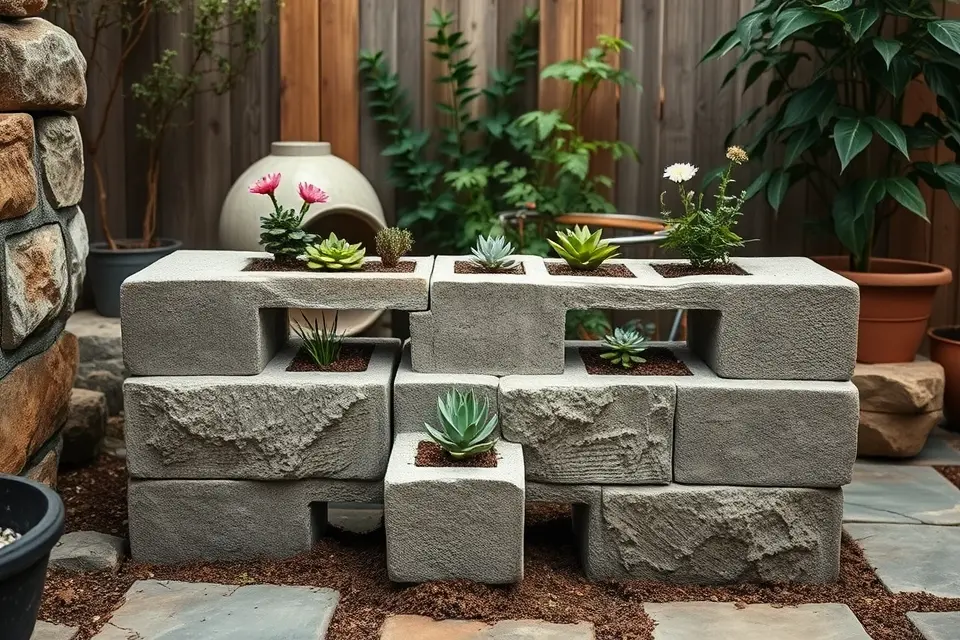
To bring this serene scene to life, consider stacking cinder blocks to form a sturdy outdoor bench, with some blocks cleverly doubling as integrated planters for succulents or small flowers. This creative DIY project not only adds a functional seating area to your garden but also introduces a touch of industrial chic.
The beauty of this cinder block bench lies in its versatility and ease of construction. By simply stacking the blocks, you can create a bench that fits your outdoor space perfectly, whether it’s a cozy nook or a larger seating area. The integrated planters add a charming touch, allowing you to showcase your favorite small plants and flowers.
To make the most of this DIY project, choose a variety of succulents or small flowers in complementary colors to add a pop of color to your bench. Consider adding a few decorative stones or pebbles around the plants to enhance the visual appeal. With a little creativity, your cinder block bench and planter can become a stunning focal point in your garden.
As you sit on your newly created bench, surrounded by the beauty of nature, you’ll appreciate the simplicity and practicality of this DIY project. So why not get creative and give your outdoor space a unique touch with a cinder block bench and planter – it’s a DIY project that’s both fun and rewarding.
Idea 14: Tin Can Wind Chimes
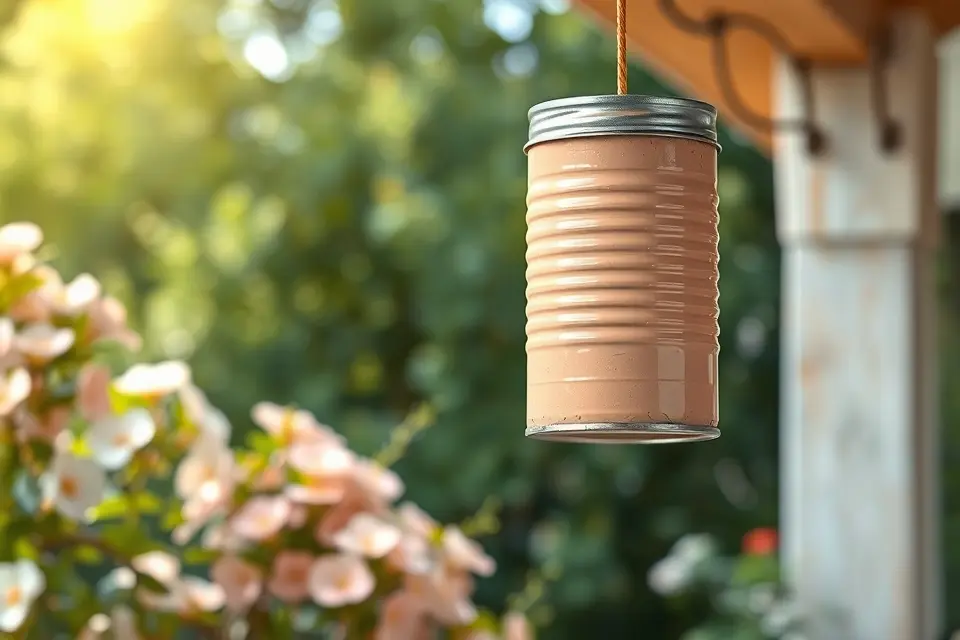
This creative DIY project is a great way to add a personal touch to your outdoor space. Simply collect various-sized tin cans, drill a hole in the bottom of each, and attach them to a metal ring or a piece of driftwood using copper wire.
As the wind blows, the tin cans will gently strike each other, producing a melodious sound that’s both calming and uplifting. To add a pop of color to your wind chime, paint the tin cans in different hues and patterns before assembling them. You can also experiment with different materials, such as sea glass or small pebbles, to create a unique sound.
To hang your tin can wind chime, look for a sturdy tree branch or a hook on your porch. Make sure it’s in a spot where the wind can catch it, but not so fragile that it might break easily. A practical tip is to use a level to ensure the wind chime is straight, and to tighten the copper wire securely to prevent the tin cans from falling off.
By creating your own tin can wind chime, you’ll not only be reducing waste but also adding a charming and whimsical element to your garden that will delight both you and your guests. As you sit amidst the sounds of nature and your handmade wind chime, you’ll feel a sense of pride and connection to your outdoor space.
Idea 15: DIY Plant Stands from Crates
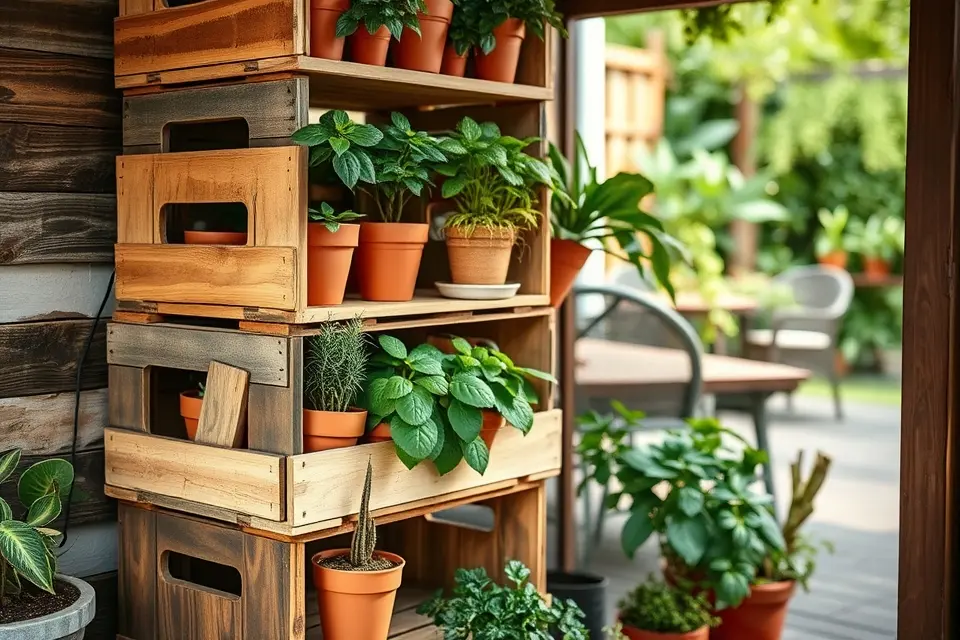
By stacking and painting these crates, you can create a one-of-a-kind display for your plants, adding height and visual interest to your garden. This DIY project is not only easy on the wallet, but it also allows you to get creative with the design and color scheme.
To start, collect a few old wooden crates and give them a good cleaning. You can then paint them in a color that complements your outdoor decor, or leave them as is for a more distressed look. Once they’re dry, simply stack them on top of each other to create a sturdy base for your plants.
The best part about this DIY project is that it’s highly customizable. You can add as many or as few crates as you like, depending on the size of your plants and the space you have available. You can also add some decorative touches, such as ribbons or twine, to give your plant stands a more personalized look.
By repurposing old wooden crates into plant stands, you’ll not only be adding some character to your outdoor space, but you’ll also be reducing waste and giving new life to old materials. So why not get creative and give this DIY project a try – your plants and the environment will thank you.
Start Creating Your Dream Garden
With these 15 DIY garden decor ideas, you’re ready to start transforming your outdoor space into a beautiful and functional oasis. Remember to have fun and get creative with the process! Don’t forget to save this pin for your next DIY project and share your favorite garden decor ideas with your friends and family. Happy gardening and decorating!
Frequently Asked Questions
What are some common materials used for DIY garden decor?
Common materials include reclaimed wood (pallets, crates), old tires, mason jars, tin cans, terracotta pots, broken tiles, and natural elements like rocks and driftwood.
How can I make my DIY garden decor weather-resistant?
To make decor weather-resistant, use outdoor-grade paints and sealants, consider materials naturally resistant to rot or rust, and ensure proper drainage for planters.
What are budget-friendly options for outdoor garden decorations?
Budget-friendly options include upcycling household items, using natural materials found in your yard, and shopping at thrift stores or dollar stores for supplies.
How do I incorporate DIY decor into a small outdoor space?
For small spaces, focus on vertical elements like pallet gardens or wall-mounted planters, multi-functional decor, and pieces that don’t overcrowd the area.
Can DIY garden decor increase curb appeal?
Yes, thoughtful and well-executed DIY garden decor can significantly enhance curb appeal by adding personality, charm, and a well-maintained look to your outdoor space.